In this lesson you will learn how to build an app. What great app will you build?

PROJECT OVERVIEW
This introductory course provides an overview of all essential elements of the MIT App Inventor program needed for design, layout, and code an app. This course is intended for participants with little or no knowledge of design and coding, but wish to create mobile apps for Android.
NOTE: Currently, MIT App Inventor is only able to export apps to Android. MIT is currently working on this and has released a beta version in TestFlight. There is no guarantee the app is stable for classrooms or large projects. If you would like to learn more, please visit this link.
PROJECT MATERIALS/LINKS
- Computer (Windows)
- Because of its web-based application, MIT App Inventor is able to support lower-end computers and laptops.
- Mobile Device (Android)
- You can use any android device, phone, or tablet, and is compatible with their MIT AI2 Companion App.
- The companion app will give you feedback on your app as you continue to work on it in the browser. You’ll see this in action further in the course.
- MIT App Inventor Link
- https://appinventor.mit.edu/
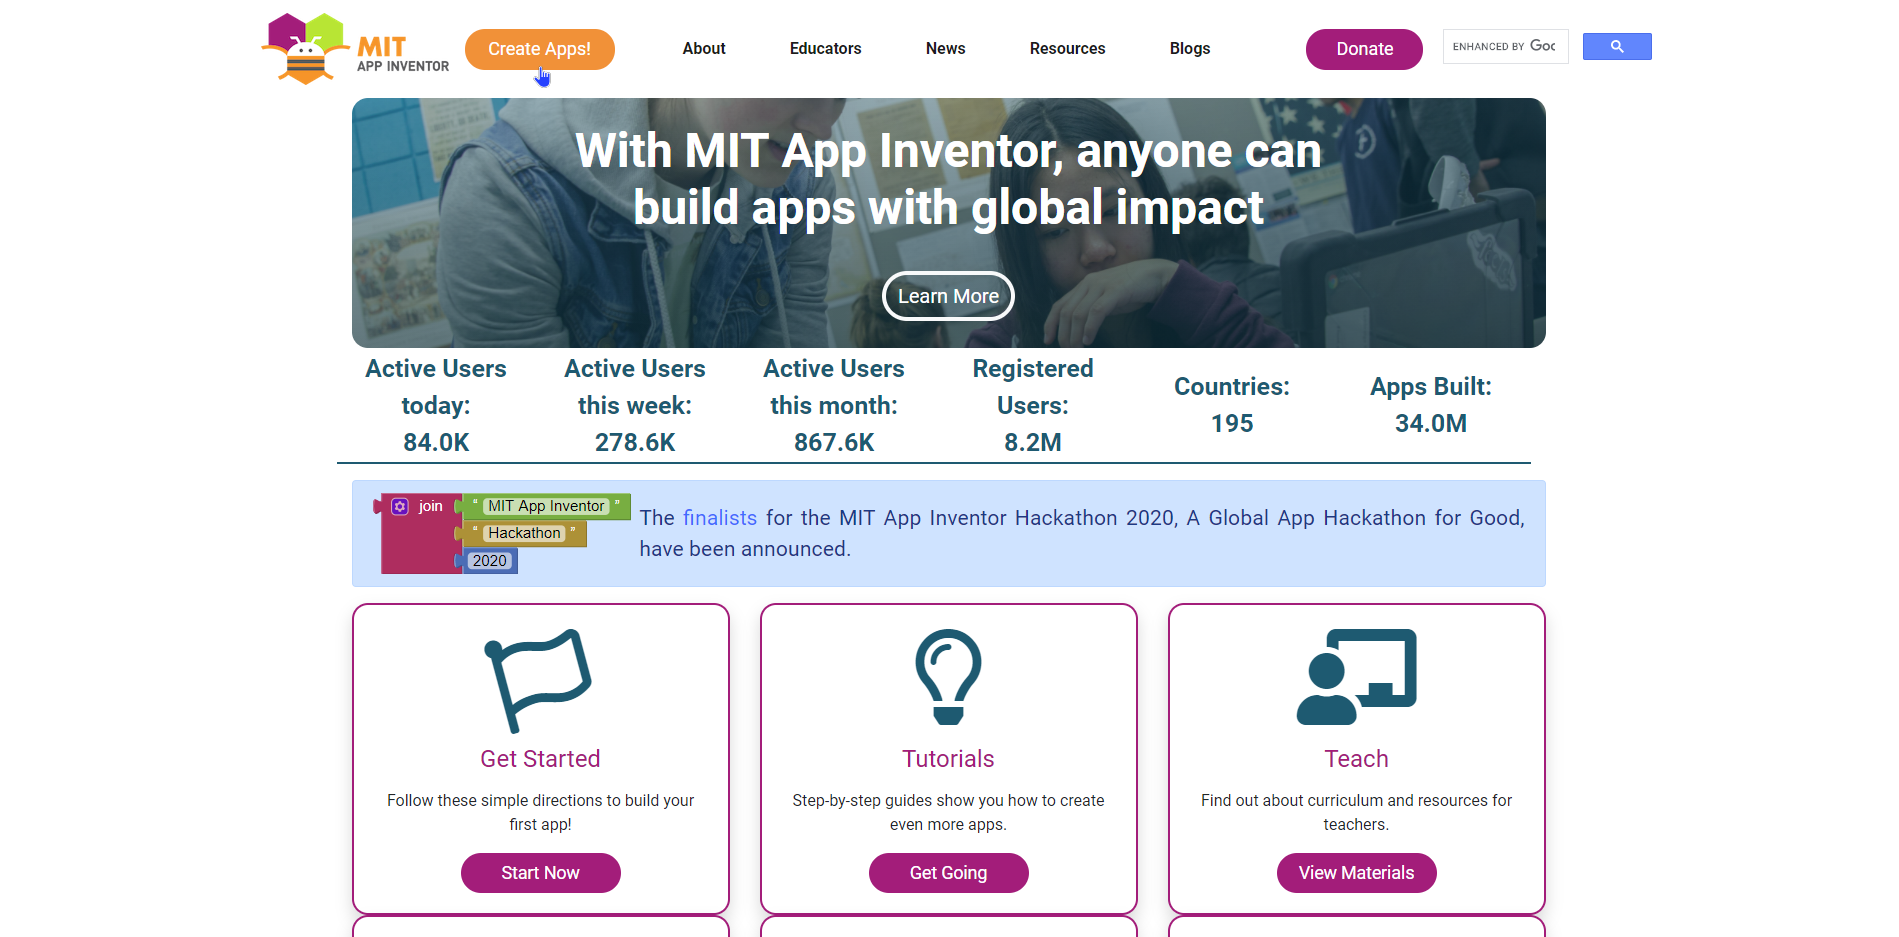
- This is the MIT App Inventor’s home page. Once you click on “Create Apps!”, you’ll need to log in with a google account.
- MIT App Inventor Guide
- https://appinventor.mit.edu/explore/get-started
- If you need further instruction or are interested in other projects, click the link above. The MIT team has also created a wonderful repository of resources where you’ll be able to find tutorials, open-source information, and help from the community.
PROJECT OUTLINE
- LESSON 1: Setting up MIT App Inventor
- In this lesson, students will learn how to sign in and create their first project. Students will also learn how to pair their mobile devices with the companion app. If the student does not have a mobile device, MIT App Inventor has an emulator built within.
- LESSON 2: Creating the Layout of your App
- In this lesson, students will follow a step-by-step tutorial in creating the layout. Students will need to create a second layout screen only being provided an image of the final result.
- LESSON 3: Coding your App
- In this lesson, students will learn how to code their app. MIT App Inventor’s coding is block-based. Making it easy for anyone to quickly catch on.
- LESSON 4: Exporting your App
- In this final lesson, students will learn how to export their apps to their mobile devices. They’ll learn how to download their apps and share them with others.
LESSON 1: SETTING UP MIT APP INVENTOR
Step 1
Go to the MIT App Inventor page http://appinventor.mit.edu/ and click on the orange “Create Apps!” button.
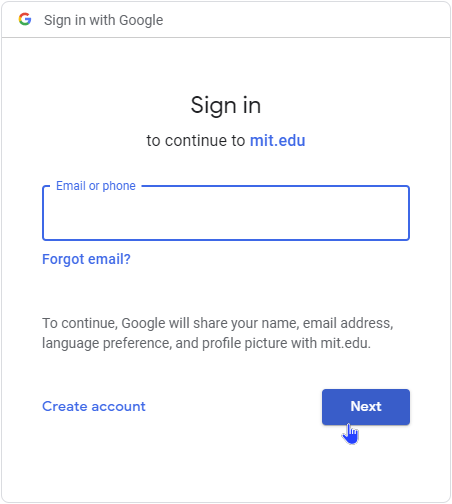
It will then prompt you to sign in with a google account.
After you sign in, you should be greeted with a pop-up for your new App Inventor project. Create a name and click “OK”.
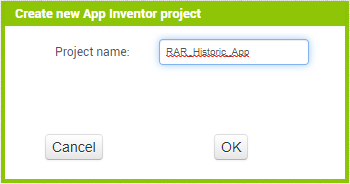
Notice: You can ONLY use letters, numbers, and underscores for your project title. This will also be the name of your app file.
Step 2
This is the main interface of App Inventor. Here you can design and modify the way your app looks. You’ll have access to the Palette, Viewer, Components, and Properties. Before navigating further, you should connect your mobile device to your project.
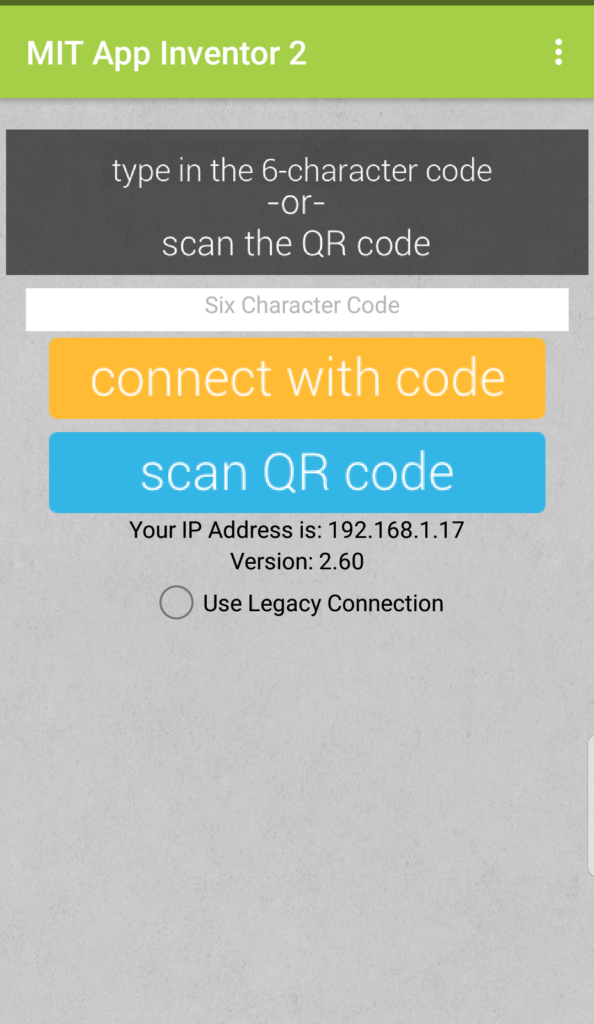
First, download the MIT AI2 Companion app from the Google Play Store to your device (Android).

Once downloaded, open the app and press the “scan QR code” button on your device.
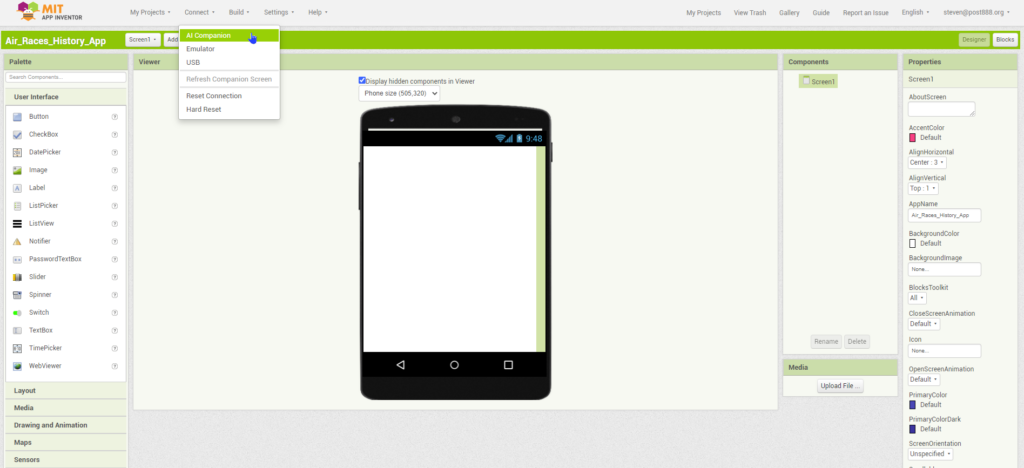
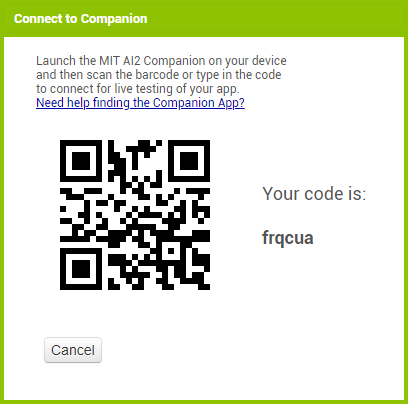
After that, go to the App Inventor desktop and click on Connect → AI Companion. Scan the QR code with your device and after a few seconds, you should be synced and connected to your app.
If you do not have a compatible device, you can also create an emulator within the App Inventor desktop program. You’ll need to install and run the emulator software. You can download it here with further instructions. After installing, simply click on Connect –> Emulator.
LESSON 2: CREATING THE LAYOUT OF YOUR APP
Step 3
Let’s take a look at the Properties tab, located on the right side. Here you can change any of the components you click on as well as the Main Screen. Let’s upgrade our screen!
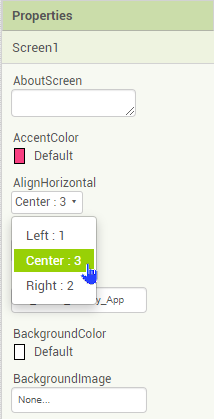
- Change AlignHorizontal from Left:1 to Center:2
- This will make all components on this screen being aligned to the center.
- Change BackgroundImage by adding an image of your choosing to be the background
- When you click on the bar, a drop-down menu will appear. Since this is a new project, you will need to upload a new image.
- Click on upload and select an image from your computer. You may need to resize and adjust the image to fit your device. You can use any software to modify your image.
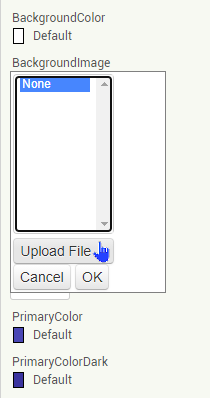
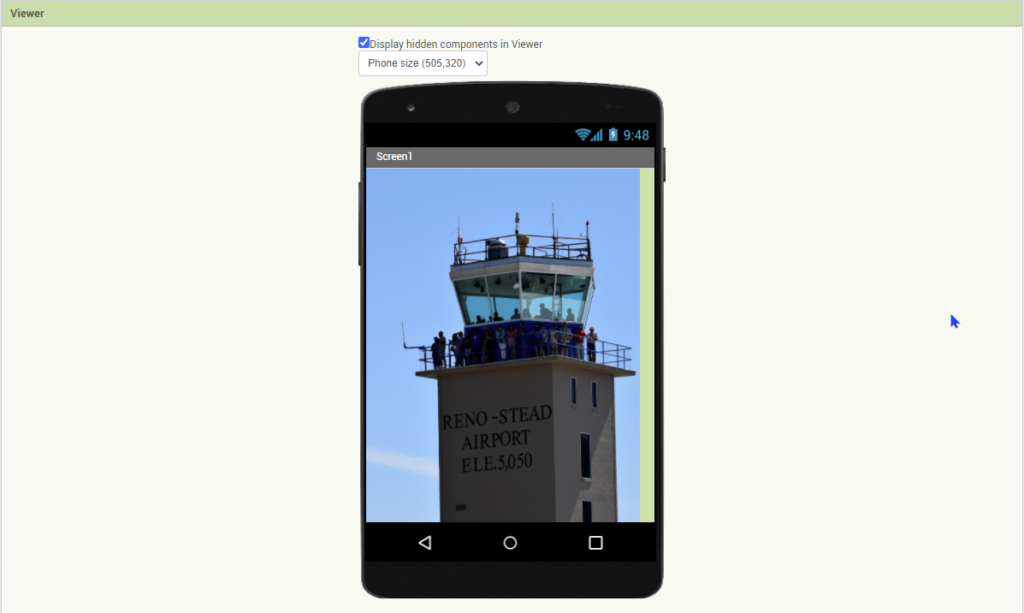
Your image should now show up on both the Viewer and your mobile device. If you decide to add more screens (a later step found in this tutorial), you can have different background images. You can add more images and media files by clicking upload under the Media tab.
Step 4
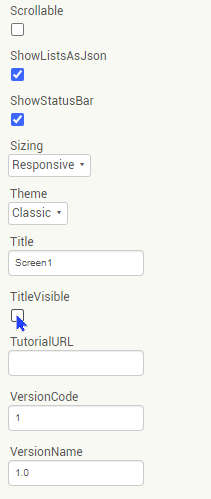
If you’ve noticed on your Viewer or device, there is a title bar named “Screen 1”. You can remove it by going to Properties → uncheck TitleVisible.
You can also toggle the status bar if you want your app to cover the entire screen.
Step 5
Now that background is finished, let’s continue working on our main menu.
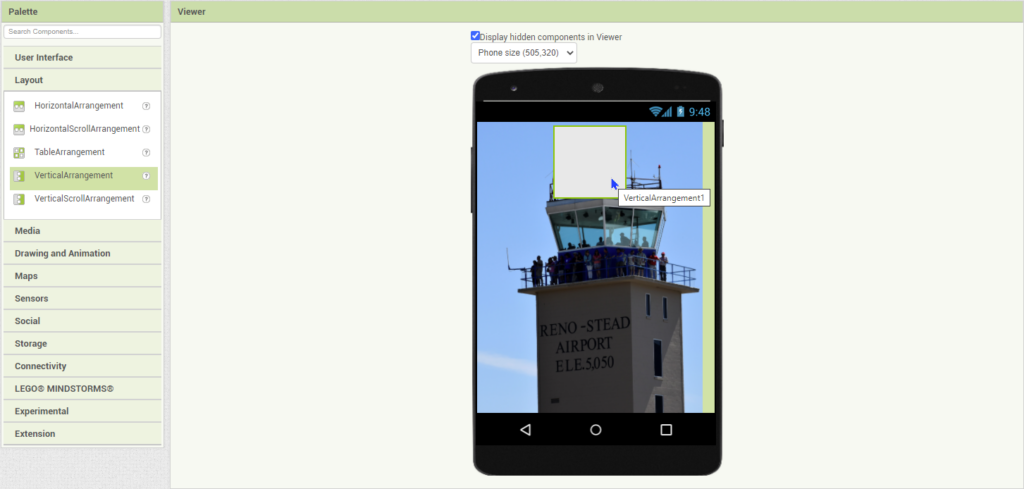
- Go to the Palette tab and click on Layout → VerticalArrangement.
- Click and hold to drag the VerticalArrangement to the viewer. This arrangement will be for the main menu title.
- These arrangements can help group multiple components in App Inventor. Making it easier to align or group similar components.
Go to Properties and make the following changes:
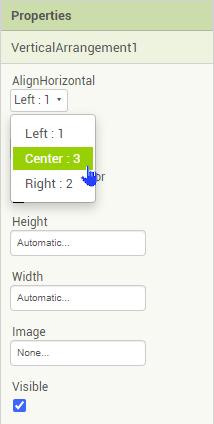
- Change AlignHorizontal from Left:1 to Center:2
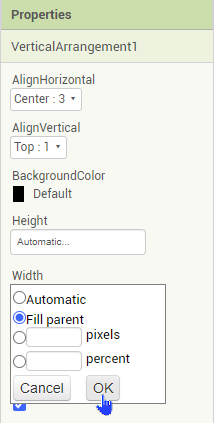
- Change Width from Automatic to Fill parent
- Automatic will vary in size depending on the components you add. Fill parent will fill the screen either horizontal or vertical arrangement.
Step 6
Now we add our components to our VerticalArrangement. Let’s add labels for our title!
- Go to the Palette tab and click on User Interface → Label
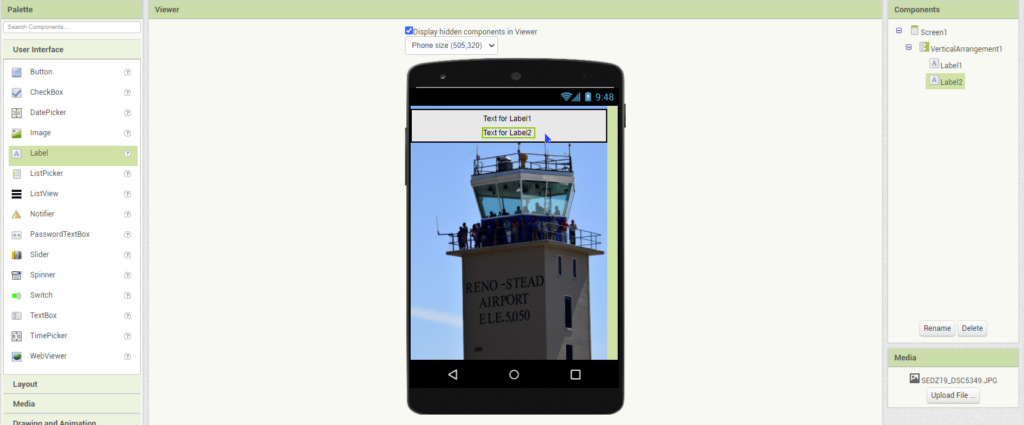
- Drag 2 labels to the VerticalArrangement
- Your VerticalArrangement should automatically stack your labels.
We can now modify our labels using the Properties tab.
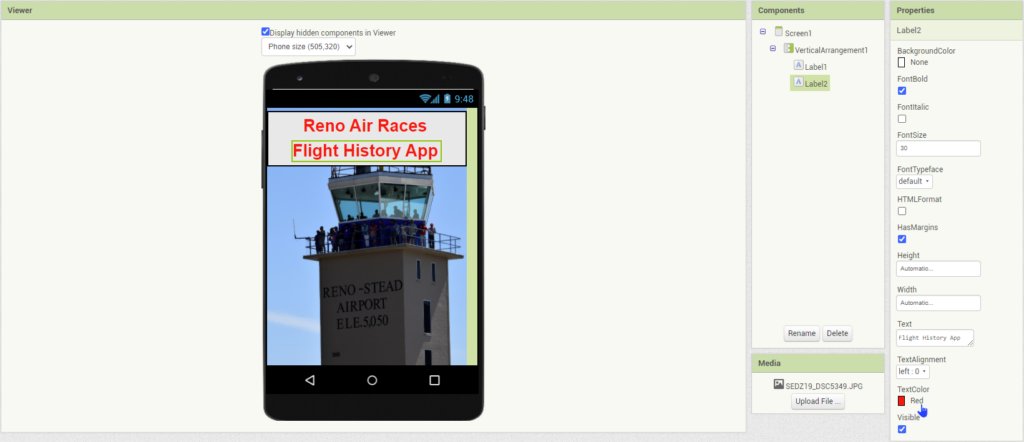
- Change text for label 1 to Reno Air Races
- Change text for label 2 to Flight History App
- Check box for FontBold
- Change FontSize to 30
- Change the TextColorfor both Labels to Red
Step 7
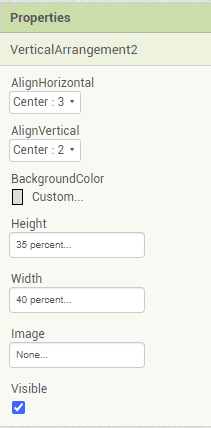
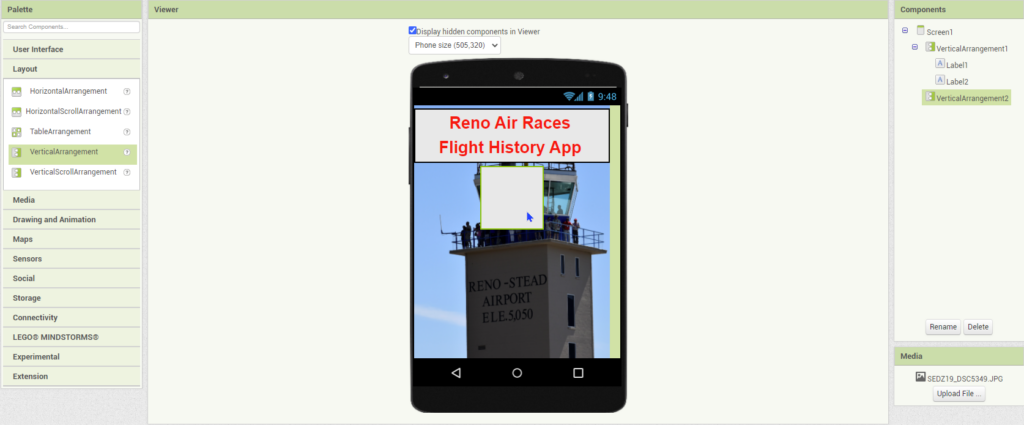
Now we need to add another VerticalArrangement to our main menu. Go to Properties and make the following changes:
- Change AlignHorizontal to Center:3
- Change AlignVertical to Center:2
- Change Height to 35 percent
- Change Width to 40 percent
Step 8
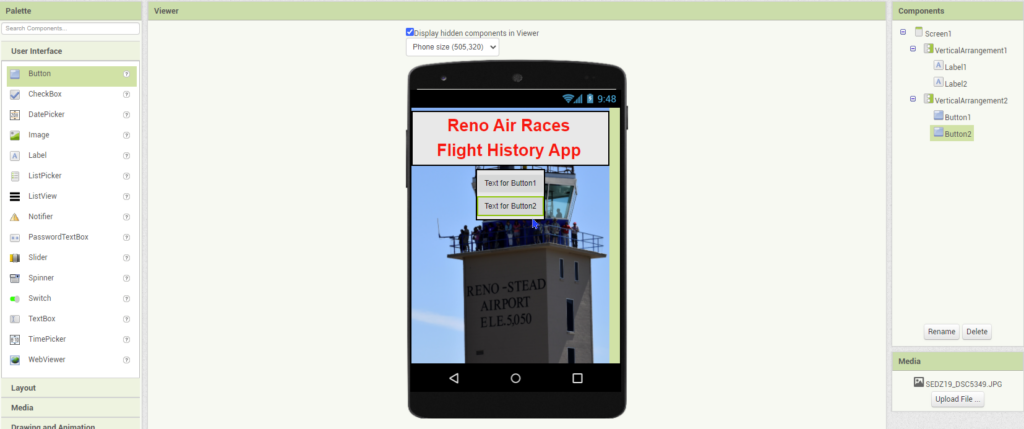
Go to the Palette tab, under User Interface, and select 2 buttons.
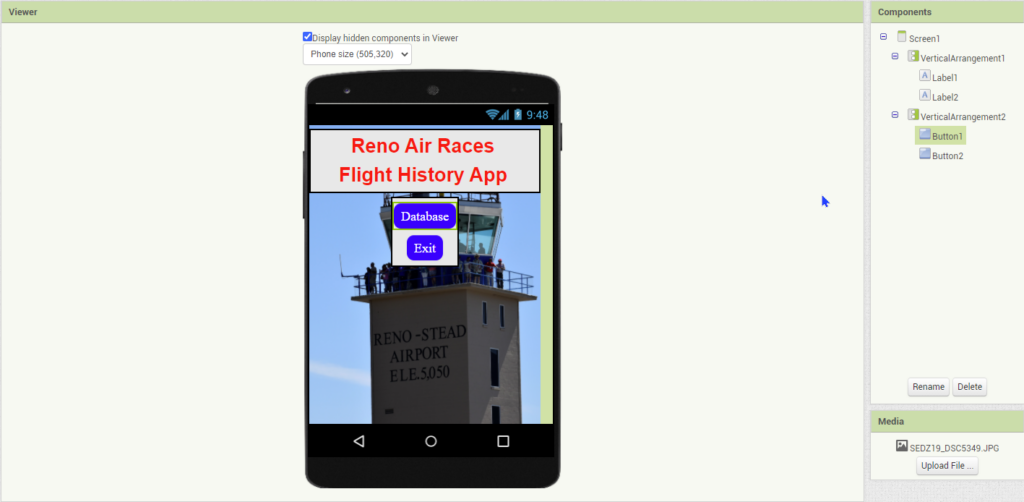
Now let’s customize our buttons!
- Change Background to Blue
- Change FontSize to 20
- Change FontTypeface to Serif
- Change Shape to rounded
- Change Text to Database
- Change TextAlignment to Center:1
- Change TextColorto White

Your layout should look like this.
Step 9
If you are using your AI companion, you might notice that VericalArrangements and Buttons may look compressed on your mobile device. Not to worry. A neat trick to give you some space in between the arrangements and buttons is by adding labels.
- Add Labels between the arrangements and buttons as pictured below
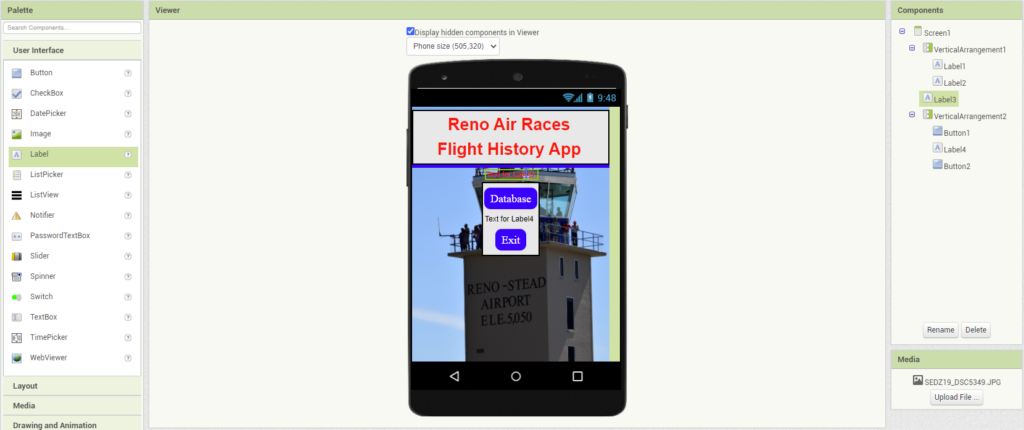
For the label in between the VerticalArrangments:
- Change the Height to 20 percent
For the label in between the Buttons:
- Change the Height to 15 percent
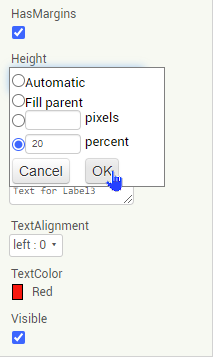
Your Labels should look like this.
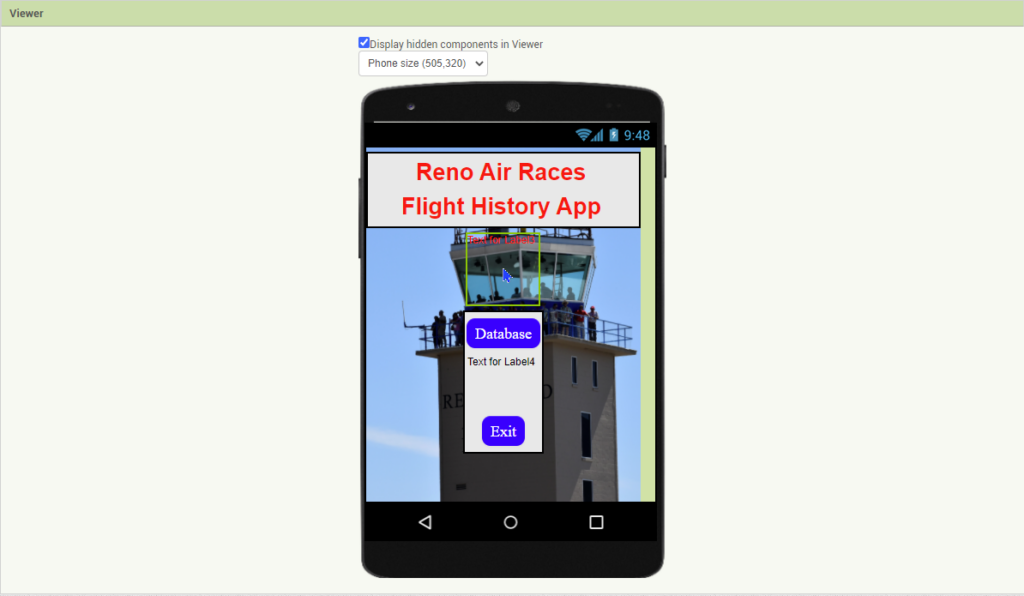
Now you can delete the text of the Labels, resulting in the Labels appearing invisible.
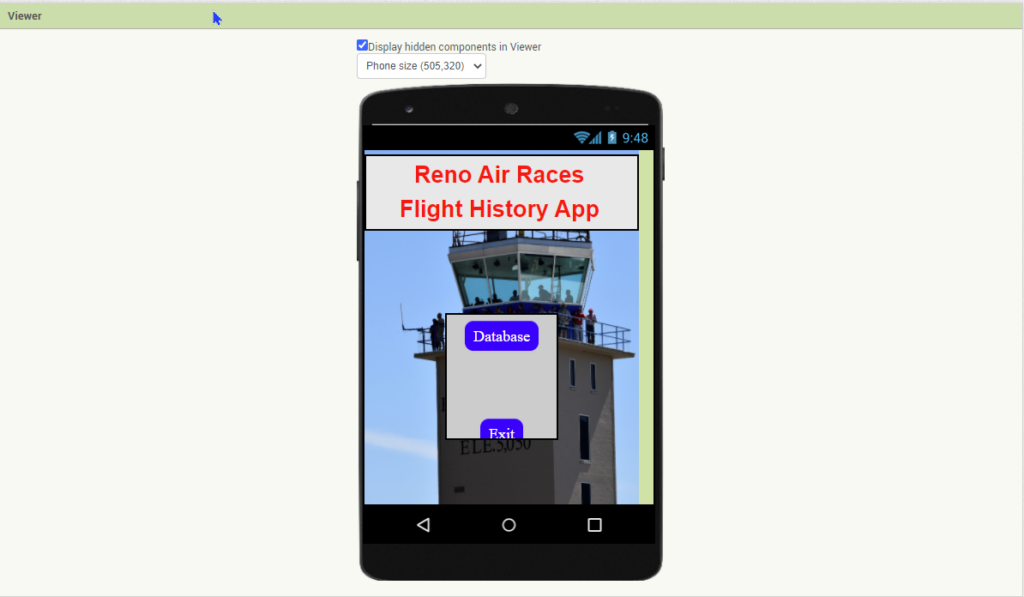
Depending on the device, you may have to tweak the percentage to have the arrangements perfectly aligned.
Note: If some components are cut off in the desktop Viewer, such as the “Exit” button pictured above, you don’t need to worry. This happens to the limited size of the Viewer in App Inventor. Using the AI Companion will help guide you in creating the appropriate size and location of your components.
Step 10
Still with us? Great! Now that we are approaching the end of Screen1, we need to make sure our components are named appropriately. This will help us later when we begin coding the app. To rename the components go to the Components tab and select a component by clicking on it.
- Click on Button1 and then click on Rename down below
- Change the name to an easy identifier. (Ex. Database_Button)
- Only letters, numbers, and underscores are allowed
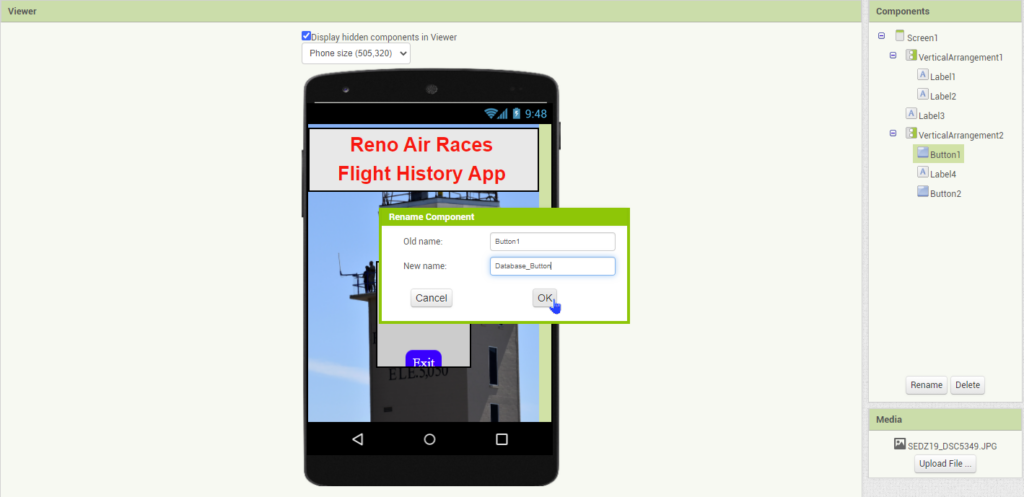
This will help in organizing and identifying your components when coding. Any changes to components can be easily found in the Design interface. For example, if you have multiple buttons, a name would be easier to find rather than a number. Use the image below as an example.
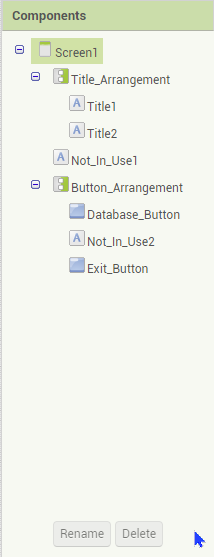
Step 11
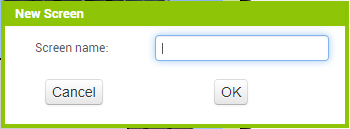
Now it’s time to create a new screen. Go to the top section and click on the “Add Screen…” button. A pop-up window will appear. Name your screen to help identify it.
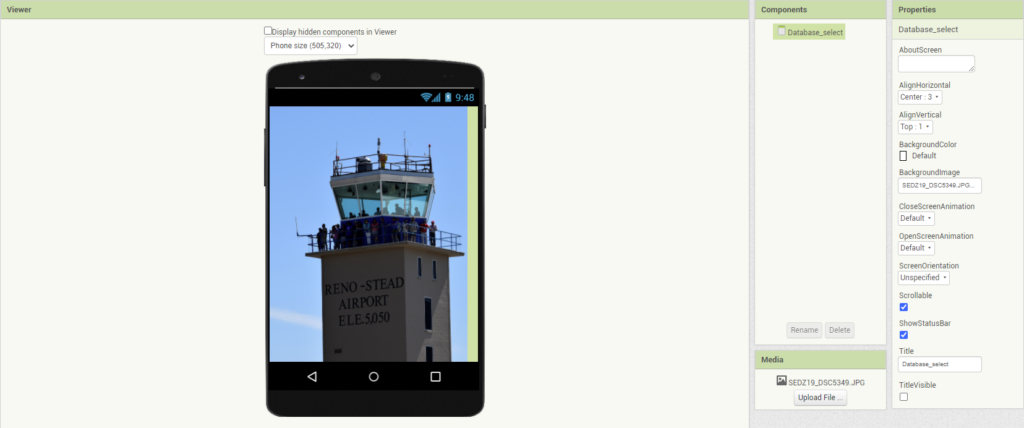
Your new screen should appear now.
Step 12
First, let’s change the background again. You can use another image or stick with the main page one.
- Set AlignHorizontal to Center
- Check the box on Scrollable
- Uncheck on TitleVisible
Step 13
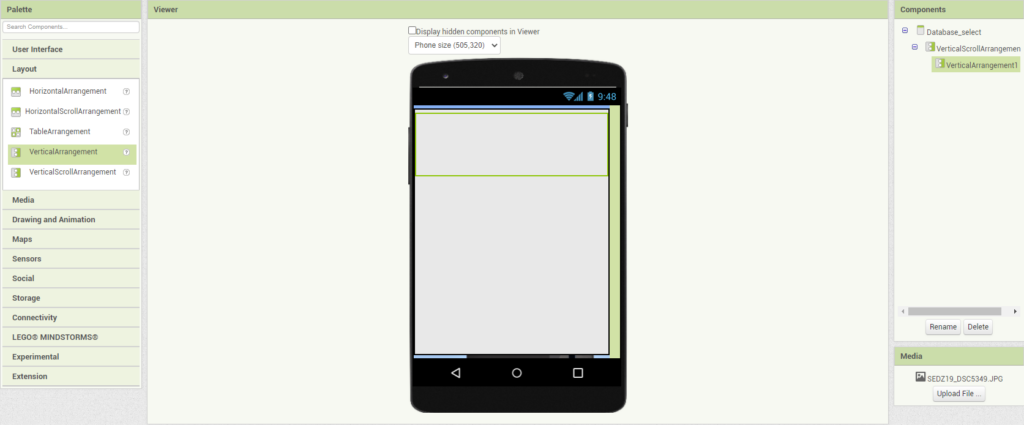
This screen will not only be our selection years, but it will also include our Webviewer. The Webviewer allows users to open websites within the app. Making it a seamless experience. How are we going to fit all this inside the tiny screen? That’s where arrangements really come in hand. Once we move on to coding, we can make certain arrangements invisible. Let’s start by adding a VerticalScrollArrangement.
- Make the height & width of the VerticalScrollArrangement “Fill Parent”
- The add a VerticalArrangement within the VerticalScrollArrangement.
Bellow the VerticalScrollArrangement add a VerticalArrangement. Within this arrangement add in the HorizontalArrangement. Then add a Webviewer within the HorizontalArrangment.
- Make the width of the VerticalArrangement “Fill Parent”.
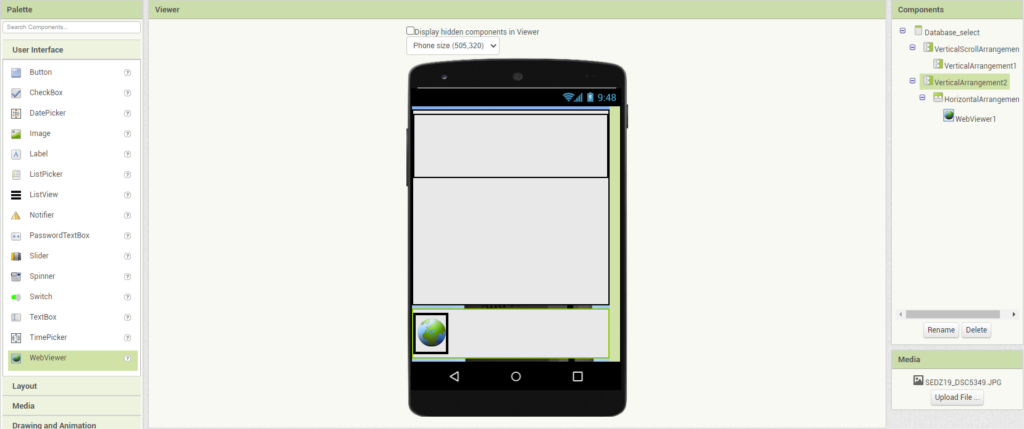
We are done with the Webviewer component.
Step 13
Now we can focus on the Year Selection screen. We need to add a HorizontalArrangement within the VerticalArrangement (highlighted in green). This is where we’ll place all components. Since the steps are similar to the first screen, go ahead and try this yourself. This first layout should help you get started.
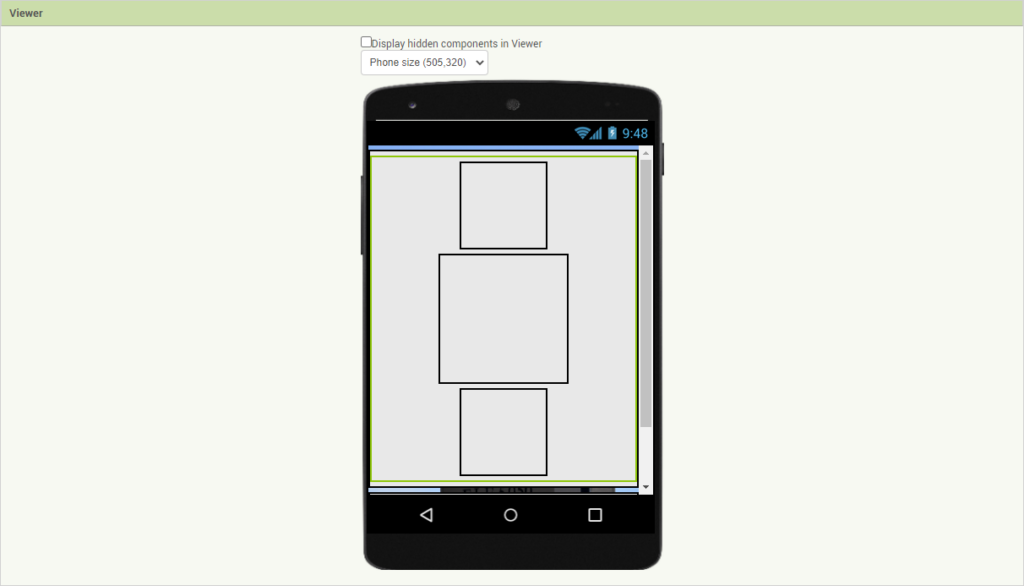
Hint: There is a new arrangement we haven’t used yet found in the VerticalScrollArrangement. This arrangement allows for multiple components BOTH vertically and horizontally.
Step 14
Your layout should closely resemble the image below.
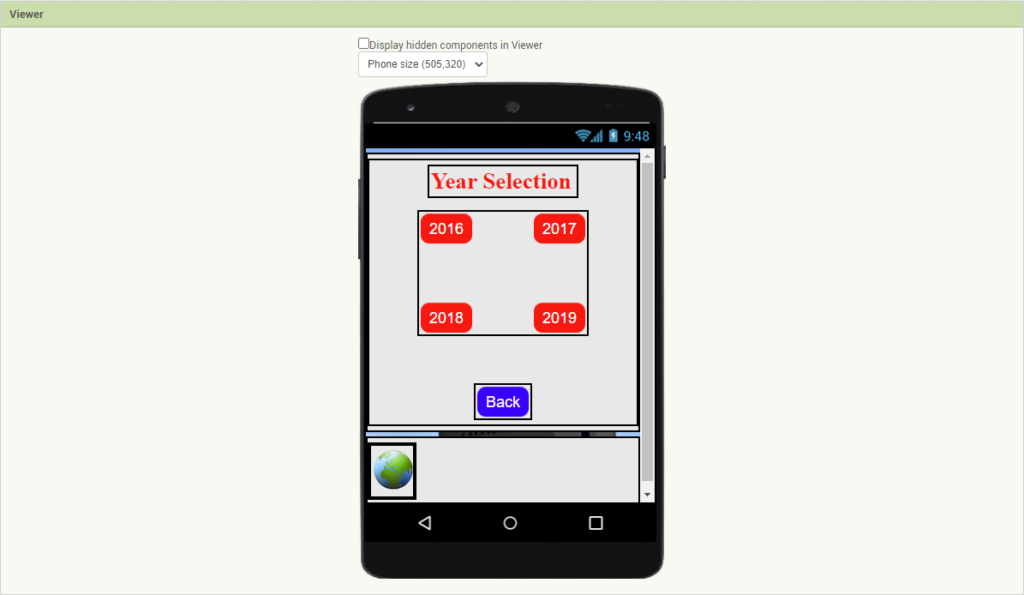
If you are missing a few components click on the drop-down menu to view all the steps.
LESSON 3: CODING YOUR APP
Step 15
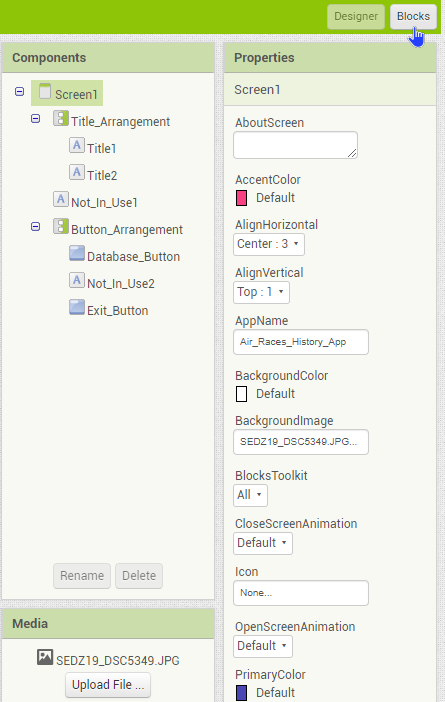
Now it’s time to head to the coding page. Head back to the first screen “Screen1” and click on the “Blocks” button found on the top right corner of the App Inventor.
Step 16
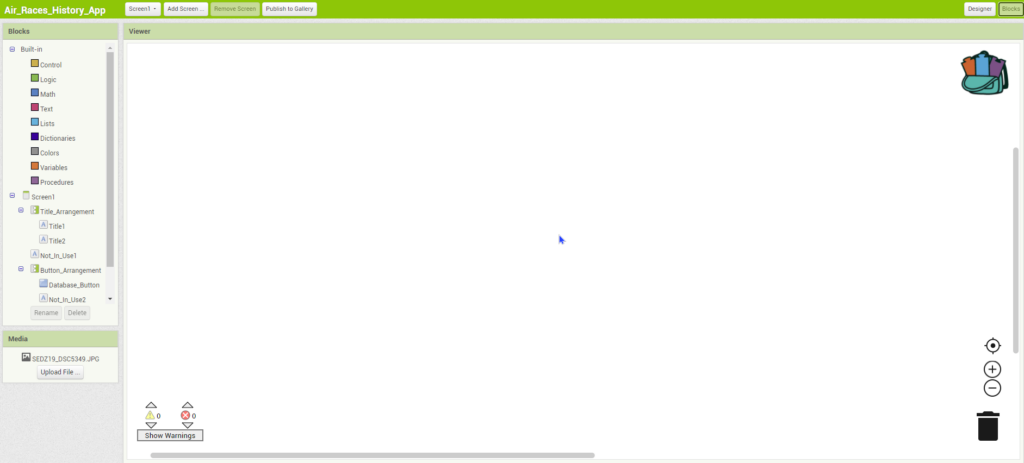
The Blocks page is where you’ll be able to do all your code. The center is where you’ll drag the coding blocks and place them together. On the left side is your repository of blocks. All the components you included in your layout will have all its available coding blocks.
Step 17
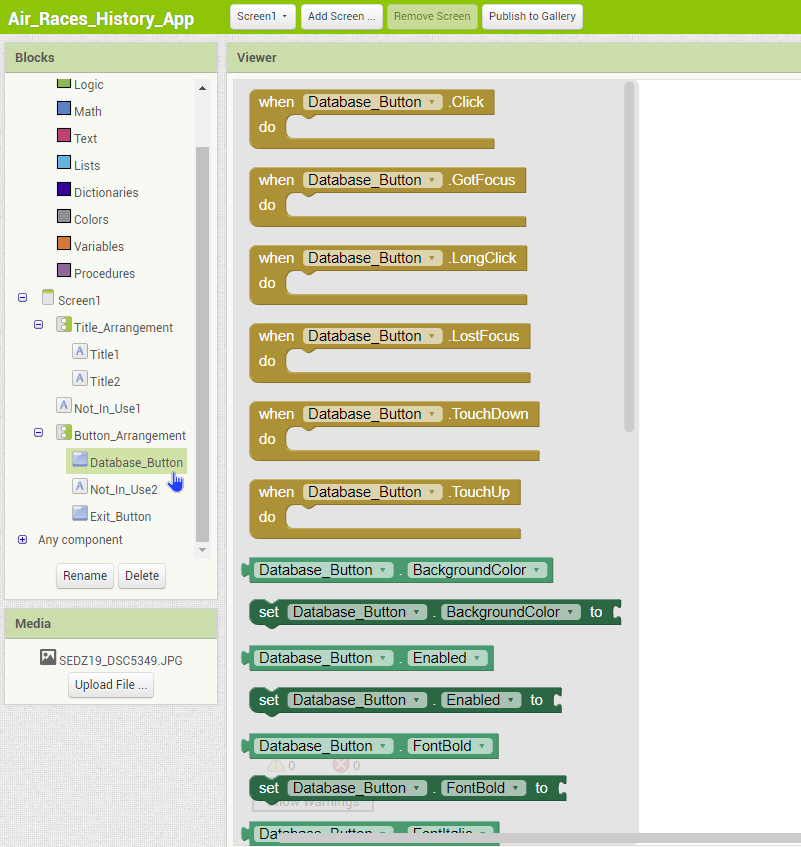
Let’s start by adding a function to our buttons. We want the Database button to take us to the second screen.
- Click on the database button and it will bring up all the blocks related to that component.
- Drag the first block, <when Database_Button.Click>, to the center.
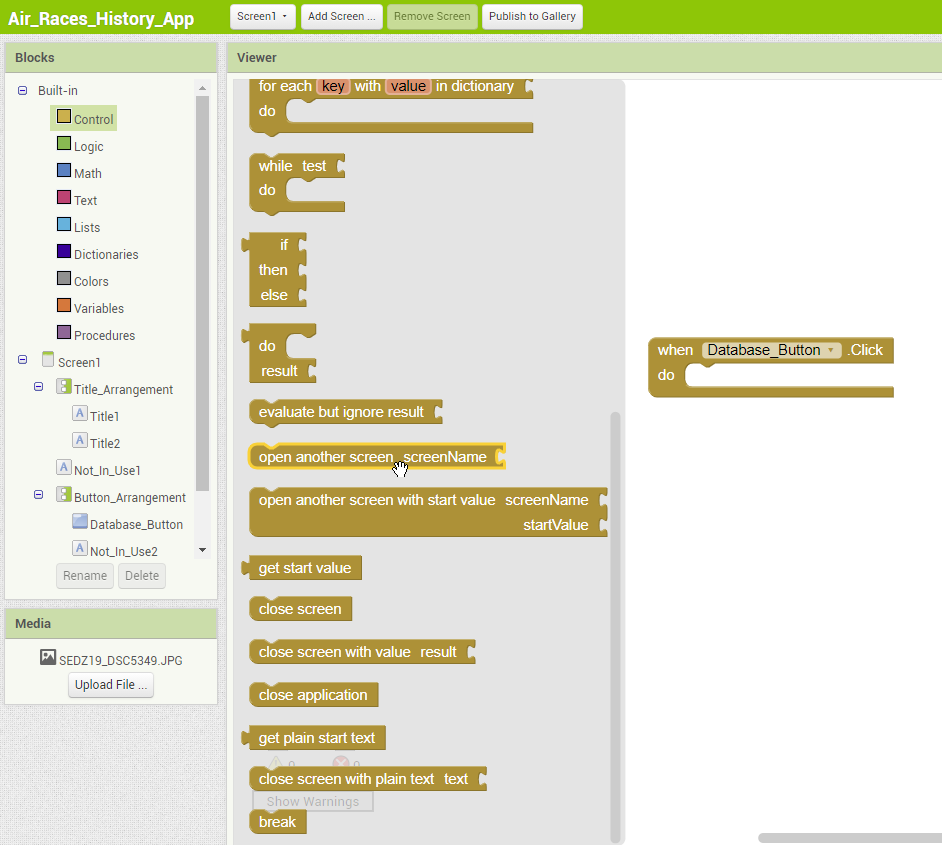
- Now got to the Control blocks and drag the <open another screen screenName>
- Next, click on the Text blocks and drag the first block, the text block.
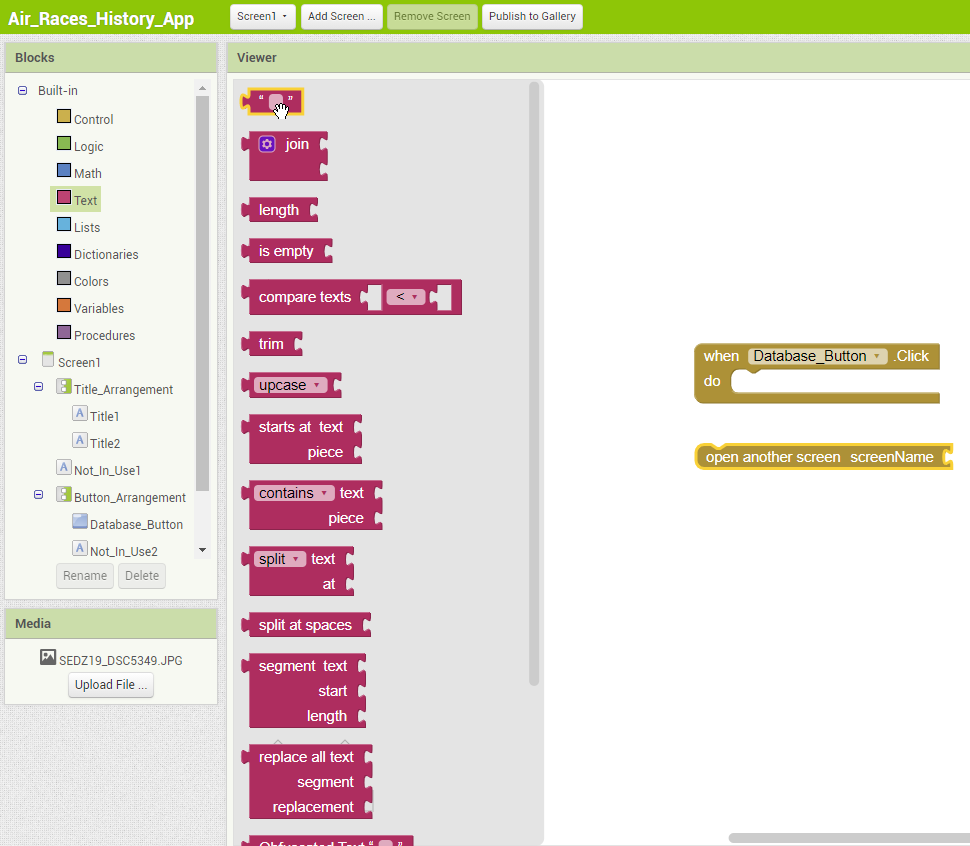
Now we can combine all three blocks like so. In the text box, write the name of your second screen. It MUST be the same otherwise your second screen won’t be found.

Step 18
For the Exit button, we want to exit the application. We can start by clicking on the Exit button blocks and dragging the <when Exit_button.Click>.
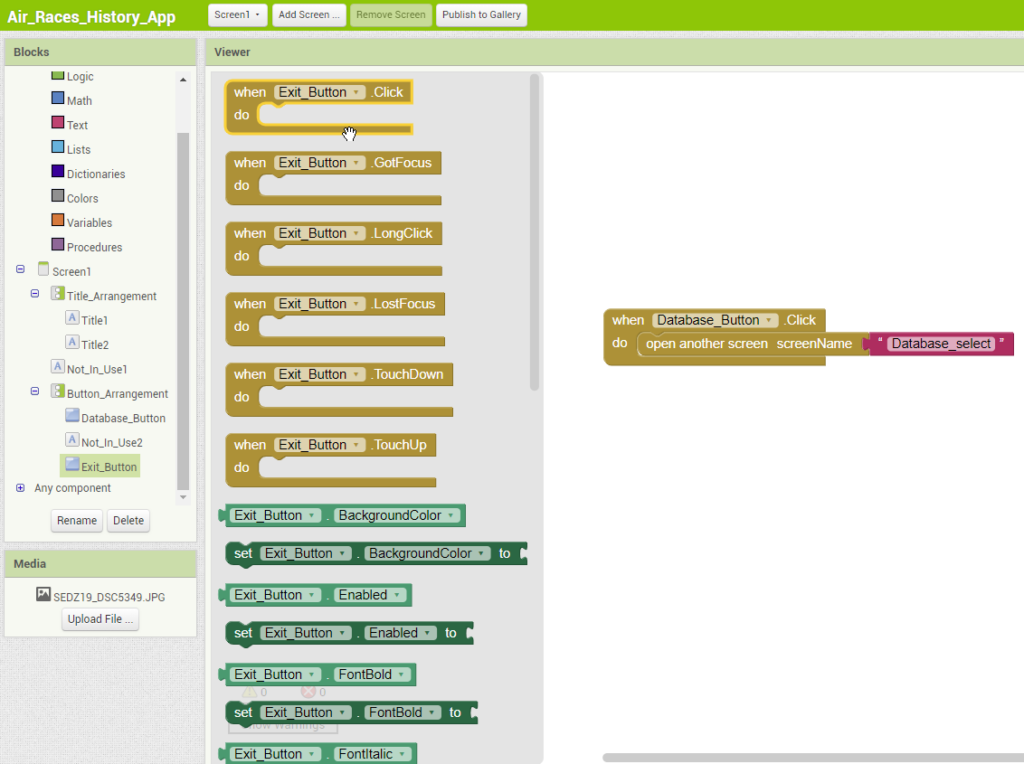
- Head over to the Control blocks and drag the <close application>
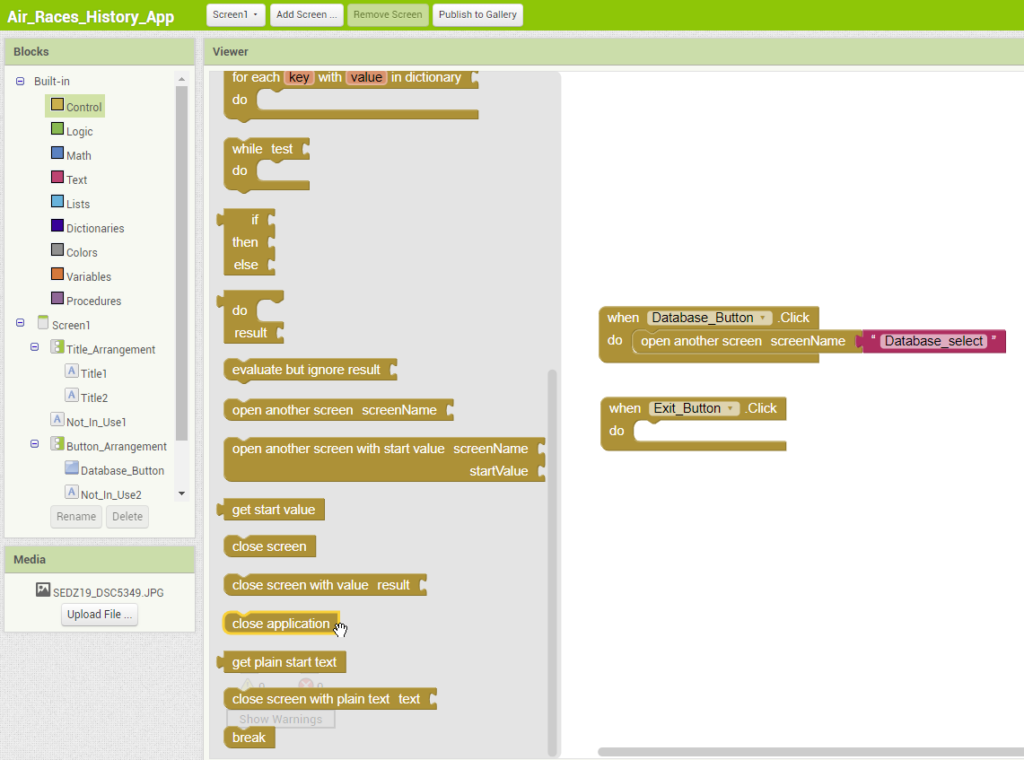
Combine the two blocks. Your blocks should look like this.
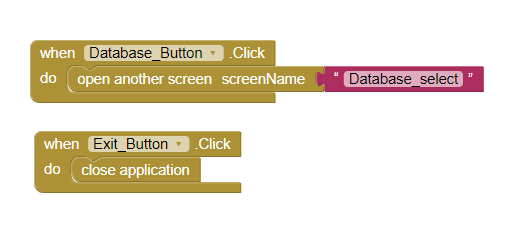
Every time you include new coding blocks you can use your companion device to test out the functions. If you tap on the Database button on your device, it should take you to the second screen. If it works, your coding page will also change to your second screen.
Note: The “Close application” function is not supported during development. You’ll need to download the apk. file to fully test this.
Step 19
Now let’s work on the rest of the buttons. Follow the code below and select the right blocks for the first button. Once your first block is close to being finished, look for a website you would like to visit. In this case, we go to the Reno Air Race Reports website. You’ll find all kinds of records from the Reno Air Races! Select the years you chose and copy the URL. You’ll paste the URL in the text box.

//Button block-Year selection//
<when Button1.Click
  {set VerticalArrangement1.Visible to (false)}
  {set HorizontalArrangement1.Visible to (false)}
  {call WebViewer1.GoToUrl
    url "https://reports.airrace.org/2016/2016.Unlimited.html"}
>
//Back Press-Device back button//
<when Database_select.BackPressed
  do{if [(WebViewer.Visible)=(true)]
    then [set VerticalArrangement1.Visible to (true)]
         [set HorizontalArrangement1.Visible to (false)]}
>
//Back button-Return to Screen1//
<when Button5.Click
  do{open another screen screenName "Screen1"}
>
Your Button block should look like this.


