Learn about what makes an airplane fly, and design your own paper airplane!
Introduction
How many of you remember making a paper airplane and trying to make it fly across your yard? How many of you have tried with a friend to see whose airplane can go the farthest or the highest? Well, did you know that engineers also make small-scale models of things such as airplanes to test their ideas before building the real thing? Building a model allows engineers to visualize how they will look and how it behaves in real-world applications.
How can engineers design a complicated plane from a simple paper airplane? Have you ever made an airplane, only to have it nosedive into the ground? What went wrong? Many factors can affect airplane flight performance. Features such as rudders, weight, ailerons, and elevators on the rear ends of the back wings can affect the plane’s performance. Engineers consider all this and more when designing planes for speed, distance, and cargo. Now it’s your turn to think and build like an engineer!
Just like an engineer, we don’t want to rush in and start trying to piece together random parts. Wouldn’t be very safe for the passengers. As engineers, let’s take a look and see how the world of airplanes functions, from the outside air pressure to the smallest flaps.
PROJECT OVERVIEW
In this course, students will learn the fundamental concepts of flight. Students will learn about the forces that act on a plane, how airplanes are controlled and use paper airplanes to demonstrate these principles.
PROJECT MATERIALS
• Assorted Paper
○ Students should be encouraged to create airplanes out of different materials in their experiments. This can range from A11 paper, Newsprint, Paperboard, Origami, etc.
• Airplane Templates
○ You can download our templates here for free!
• Scissors
• Tape
• Tape Measure
• Stopwatch
• Assorted Coins
○ E.g. Quarters, Dimes, Nickels, Pennies
PROJECT OUTLINE
• Lesson 1: The Four Forces
○ In this lesson, students will learn about all the forces an airplane experiences when flying. Students will also learn about air pressure and its effects on an airplane.
• Lesson 2: Anatomy of an Airplane
○ In this lesson, students will get to know the fundamental parts of a paper airplane. Students will learn about the main body, wings, tail, rudders, and flaps and how they represent the real parts of an airplane.
• Lesson 3: The Missions
○ In this lesson, students will take what they have learned from the previous lessons and experiment in designing their paper airplanes. Each mission will challenge students to experiment with different materials and different designs. The missions will have its own requirements and restrictions.
LESSON 1: THE FOUR FORCES
Air Pressure
What is air pressure? First, take a moment and imagine the atmosphere as a sea of air and just like swimming in the ocean, we are always surrounded by our atmosphere. Because it’s all around us, the air is pushing against us in all directions. This is air pressure.
Air is pushing on all objects, including people and planes, with a force of 14.7 pounds per square inch. The higher in elevation you go, the less pressure there is. Heating the air, cooling it, or physically moving it can change the air’s pressure. These differences create wind, making it possible for flight.
Bernoulli’s Principle
Daniel Bernoulli discovered that the faster water moves over a surface, the lower pressure the faces will experience. Using a tube with the middle section having a smaller circumference, Bernoulli proved that the water pressure on the sides of the middle section was less than those on the sides of the rest of the tube. Bernoulli found out that these same principles apply to air as well.
Thanks to the discovery of Bernoulli’s principle, engineers can better design and test airplane wings. After testing, they can determine the amount of lift a wing will produce (how high the airplane can go). Lift, is one of the four main forces that act on a plane. In the next lesson, we will go over these four forces and see how they affect an airplane.
The Four Forces
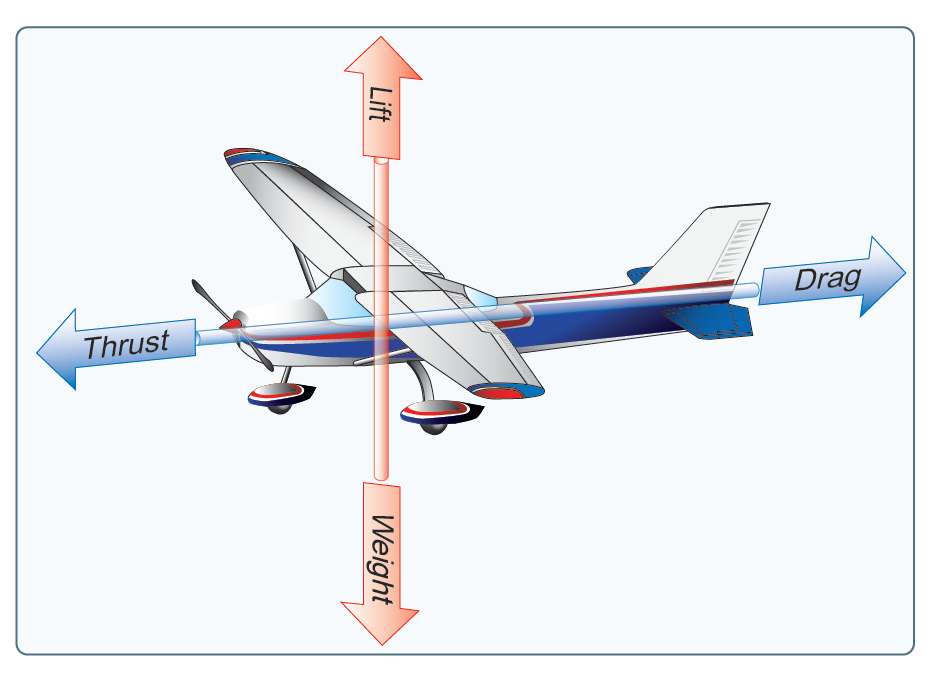
The four forces of flight are lift, weight, thrust, and drag. Each of these forces is pulling the airplane in their direction. Lift and weight are opposing forces, meaning both forces go opposite of each other. Lift is what pushes the airplane up, while gravity (weight) is the force that pulls the airplane down. Thrust is the force that moves the airplane forward and also creates airspeed. Drag is a force that acts against thrust causing the airplane to slow down.
Lift
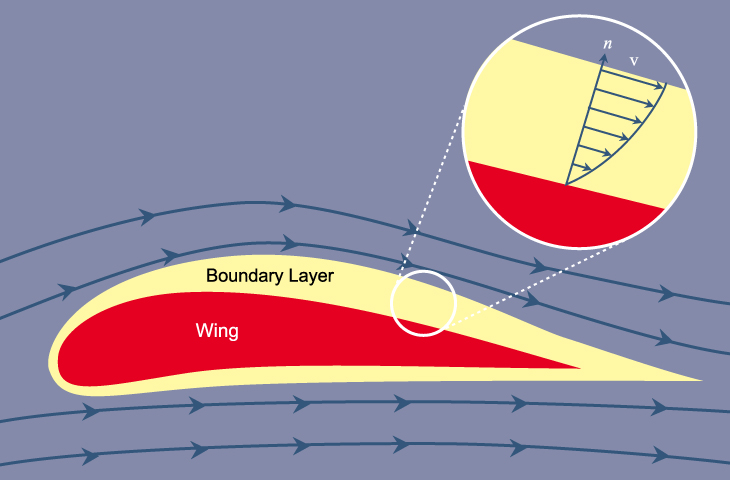
With the understanding of air pressure and Bernoulli’s principle, engineers can manipulate air pressure to create a force called lift. According to Bernoulli, faster-moving air has less pressure, while slower-moving air will create a higher pressure. In order to have lift, there must be lower pressure above the wings and higher pressure below the wings. This difference in pressure causes the wing to rise; known as lift. Before testing the wings on a real airplane, engineers first experiment with various wing shapes in wind tunnels to see their performance.
The design of the wings heavily impacts how much lift the airplane can achieve. The image below shows the side view of the wing. Here you can see the top of the wing has a taller curve, making the length, from front to back, much longer than the bottom. Because of the longer top length, the air has to travel much faster to keep up with the air moving under the wing. As we know, the faster-moving air creates lower pressure. The pressure from below the wing exerts more force resulting in the wing rising up.
Flaps can be found in the front and back edges of the wings. Changing the angle of the flaps can result in increasing or decreasing the top length, which enables more precision in rising or lowering the elevation.
Weight
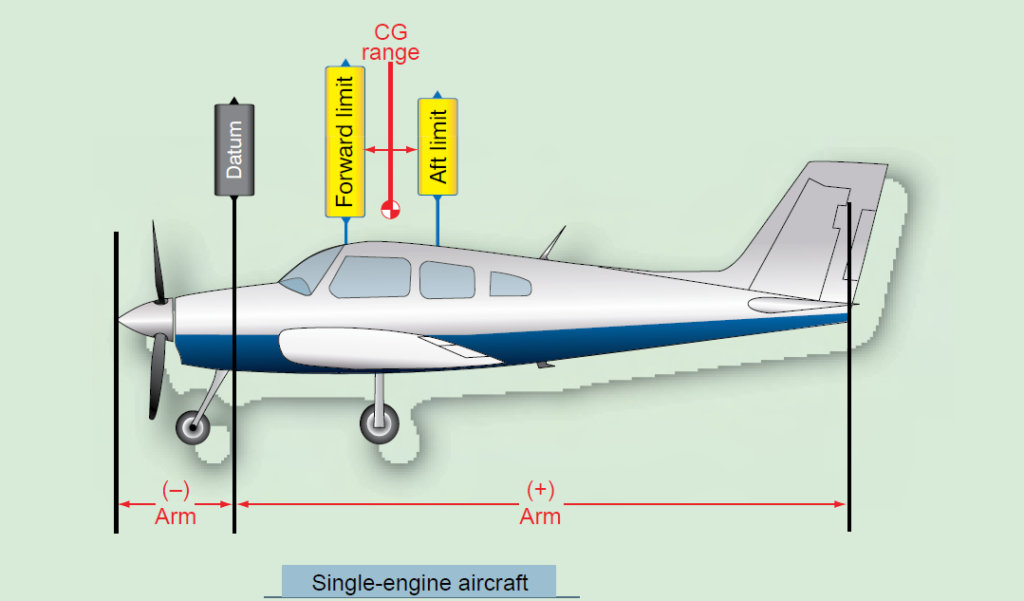
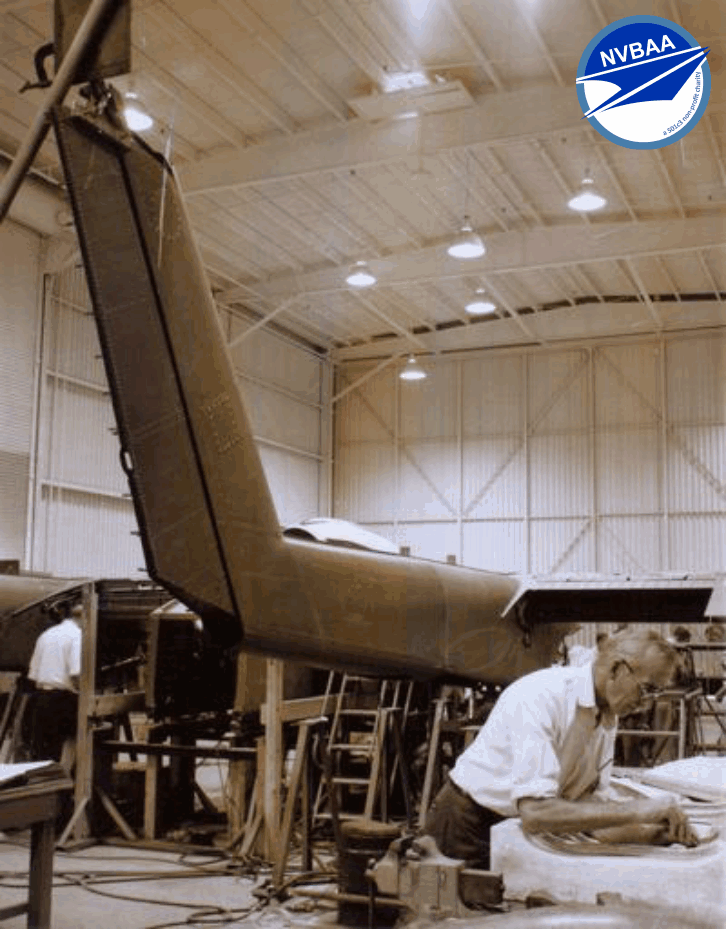
One of the most important aspects of aircraft design is weight. Engineers must take into consideration every additional part or piece added to an airplane. Any additional weight makes it harder for the airplane to overcome the force of gravity. Because of this, engineers strive to design airplanes, with parts that minimize the weight of the plane, while still assuring strength and safety.
If weight is a huge factor, why not select the lightest material and call it a day? Think about it like this, say you have some heavy groceries and you have two options for carrying them; a paper bag or a milk crate. You need to consider the strength and the weight of the bag and the crate. While the bag is lightweight, its strength can fail when traveling. The crate offers more strength but it does contribute more weight than the paper bag. Now you’ll need to exert more force when picking up the milk crate, depleting your energy.
Unlike our scenario, engineers must experiment with multiple materials. Each with different tests such as heat tolerance and pressurization tests. In order for engineers to design bigger airplanes, they must increase the lift to hold the extra weight. They can do this by increasing the airplane speed or by increasing the wing surface area. Increasing the airplane speed is difficult because the plane will experience more drag and use more fuel. Increasing the wing surface area is also difficult because this adds extra weight to the plane, which is the problem the engineers are trying to solve in the first place! One solution engineers often use is to replace parts of the plane with lighter materials. For example, today most airplanes’ bodies and wings are made of aluminum, which is lighter than steel and stronger than plastic or wood.
Sometimes engineers design new metal alloys when they cannot find a material that meets their needs. Alloys are mixtures of metals that have properties of the individual metals in the mixture. If an alloy contains a metal that is a good conductor of electricity and a metal that is strong, the alloy itself is generally strong and a good conductor. Engineers also design different types of plastic and ceramic materials.
Thrust
Imagine you are floating in space holding a huge bowling ball. If you were to throw the bowling ball in one direction, you would move in the opposite direction. The same is true with jets, rockets, and propellers, except instead of a bowling ball, they throw air or another gas. This movement of gas (air) is called thrust: the force that causes an airplane to move forwards. Not only does thrust push the airplane forwards, but that movement also allows the wings to create lift.
Airplane thrust is created by three principle mechanisms: propellers, jet engines, and rocket engines. All three engine types take advantage of the physical behaviors described by Newton’s third law of motion, which states that for every action, there is an equal and opposite reaction. All airplane engines push air backward. Newton’s third law predicts that an airplane will move forward with an equal and opposite force. This reaction force is known as thrust.
Drag
Drag is a force that acts on an object in the opposite direction than that object is moving. An object must be moving through some kind of fluid or surface for drag to occur. In this instance, the air is the fluid through which airplanes move. When an airplane flies through the air, it runs into air molecules that cause it to slow down.
LESSON 2: ANATOMY OF AN AIRPLANE
Paper airplanes are gliders. They have the main body, and generally two wings. Some are more complex, with tails, rudders, and flaps. The wings compress the air below the paper airplane, creating high pressure, and thus the airplane is able to “sit” and glide on the air. Moving the rudders, ailerons, or flaps up or down can change the flight path of an airplane. For example, folding down the wing flaps can result in a nosedive, and folding up the flaps can point the airplane in an upward direction.
First Flight
The Missions
Note: The exact parameters of the missions and where to post your videos will be linked here at a later time. Stay tuned for more updates!
As acting aerospace engineers, your mission is to design and test 3 different paper airplane models for 3 different tasks. Each mission will have its own guidelines as well as its own scoring system. If you need help with inspiration, you can start with one of the templates previously shown, and begin testing with different flaps and folds. Make your plane as unique as you want!
Each mission will have its own restrictions and requirements. Any additional components must be made out of the same material as your plane, the only exception is tape. With each mission, you must record the flight as one continuous video. No editing of the video will be allowed. We would also appreciate it if you also sent us a short report on your design process. You can create a video or images of the details and changes you made to your plane. Once you have these ready, you can send them over to us!
*To get the best results, indoors would be the ideal location, but due to current conditions, some students may not have access to indoor areas suitable for testing. For those who do not have access, testing outdoors will be acceptable. Try to find the best location and time for the best possible results and remember, stay safe outside!
“The Longest Mission”
Better get comfortable, it’s going to be a long flight.
For this mission, you must design an airplane that will allow you to reach the farthest possible distance. Look back at your previous designs. Some of them allowed you to be fast but lost control if thrown too hard. Others gave you a stable flight with vertical stabilizers but were too slow. Try combining designs and seeing what design suits you best!
Restrictions
- Must only use 1 material per plane. Extra components (e.g. flaps) must be made out of the same material. Scotch tape is allowed.
Requirements
- Video footage
- Tape Measure/Yarn
- Mark the yarn every 3 feet. As you get closer to the plane, begin marking by the inch.
Scoring:
- Based on length. 1 foot equals 1 point.
Before launching the plane, make sure the surrounding area is clear of any obstructions. Also, make sure to attach one end of the yarn to the starting point. Begin by recording the pilot and their plane right before launch. Once launched go to your plane’s destination, using the yarn, record the distance of your flight. Only measure to the front tip of your plane.
“Flight Endurance Record”
Slow and steady wins the race?
For your second mission, you must design a plane with the greatest flight endurance. Your plane must stay in the air the longest. Use your previous designs for inspiration!
Restrictions
- the
Requirements
- Video Footage
- Stopwatch
Scoring:
- 1 point for every 1 second in the air
Before launching the plane, make sure the surrounding area is clear of any obstructions. The starting point should have relatively the same height as the destination zone, meaning no starting from a higher place. Begin by recording the pilot and their plane right before launch. Make sure to record both the launch and stopwatch at the same time. As the plane is about to land make sure to record its landing and the stopwatch.
“Minor Turbulence”
Cabin crew, please take your seats for landing.
For your final mission, you must safely land your plane, filled with cargo, towards its final destination. Your plane must carry a minimum of 3 washers over 20 feet and land on a 2-foot square target. You will be scored on how much cargo your plane can carry and the accuracy of the landing zone. Points will be deducted depending on the damage to the plane.
Restrictions
- None
Requirements
- Video Footage
- Minimum of 3 pennies.
- 2-foot square target
Scoring:
- Landing Inside the small square: 50 points
- Landing inside the large square: 30 points
- All 3 washers landing “safely” with the plane: 30 points
- Additional washers: 10 points each
- Points will be deducted based on damage from the plane
- No damage: 0 points
- Minimal (small dents, cuts): -1 point
- Moderate (noticeable dents, bents, tears): -3 points
- Severe (crushed, crumpled, large tears): -5 points
For this challenge, begin by setting up the area for your landing zone. Create a square that is 2 feet out of cardboard or any similar material. Centered in the square, make a 1 foot square with a marker or tape. This will indicate the 50 point area.
Once your target is finished, go 20 feet from your starting point and place your target there. If you have a smooth surface, you can tape down your target.
Once the area has been completed and cleared for landing, you can begin your mission. As always, make sure to record your pilot and their plane before takeoff. After the plane has landed, head over to your target and see how you did. Make sure not to move your plane as we are judging you on your accuracy!
In order to score the big 50 points, more than half the length of your plane must be inside the square. Otherwise, the value for your landing will be 30 points. This also applies to 30 point area.

